Add Your App Information
After you have given your app a name and category, you need to fill in the info to populate the app details page your customers will see inside the App Market.
Fill in your app details and the about me section:
- Your ‘App name’ and ‘Category’ have been filled in from the previous step.
- List your company or app’s website, support email address, and your company name.
-
The App Scope defines whether your application’s billing is bound to an Account or to a Site. The ‘Account’ scope setting means that a customer can purchase your app and use it across all the sites they own. The ‘Site’ scope setting means that your app’s billing is bound to a site, so that a customer must buy a separate instance of your app in the App Market for each site they want to use it on.
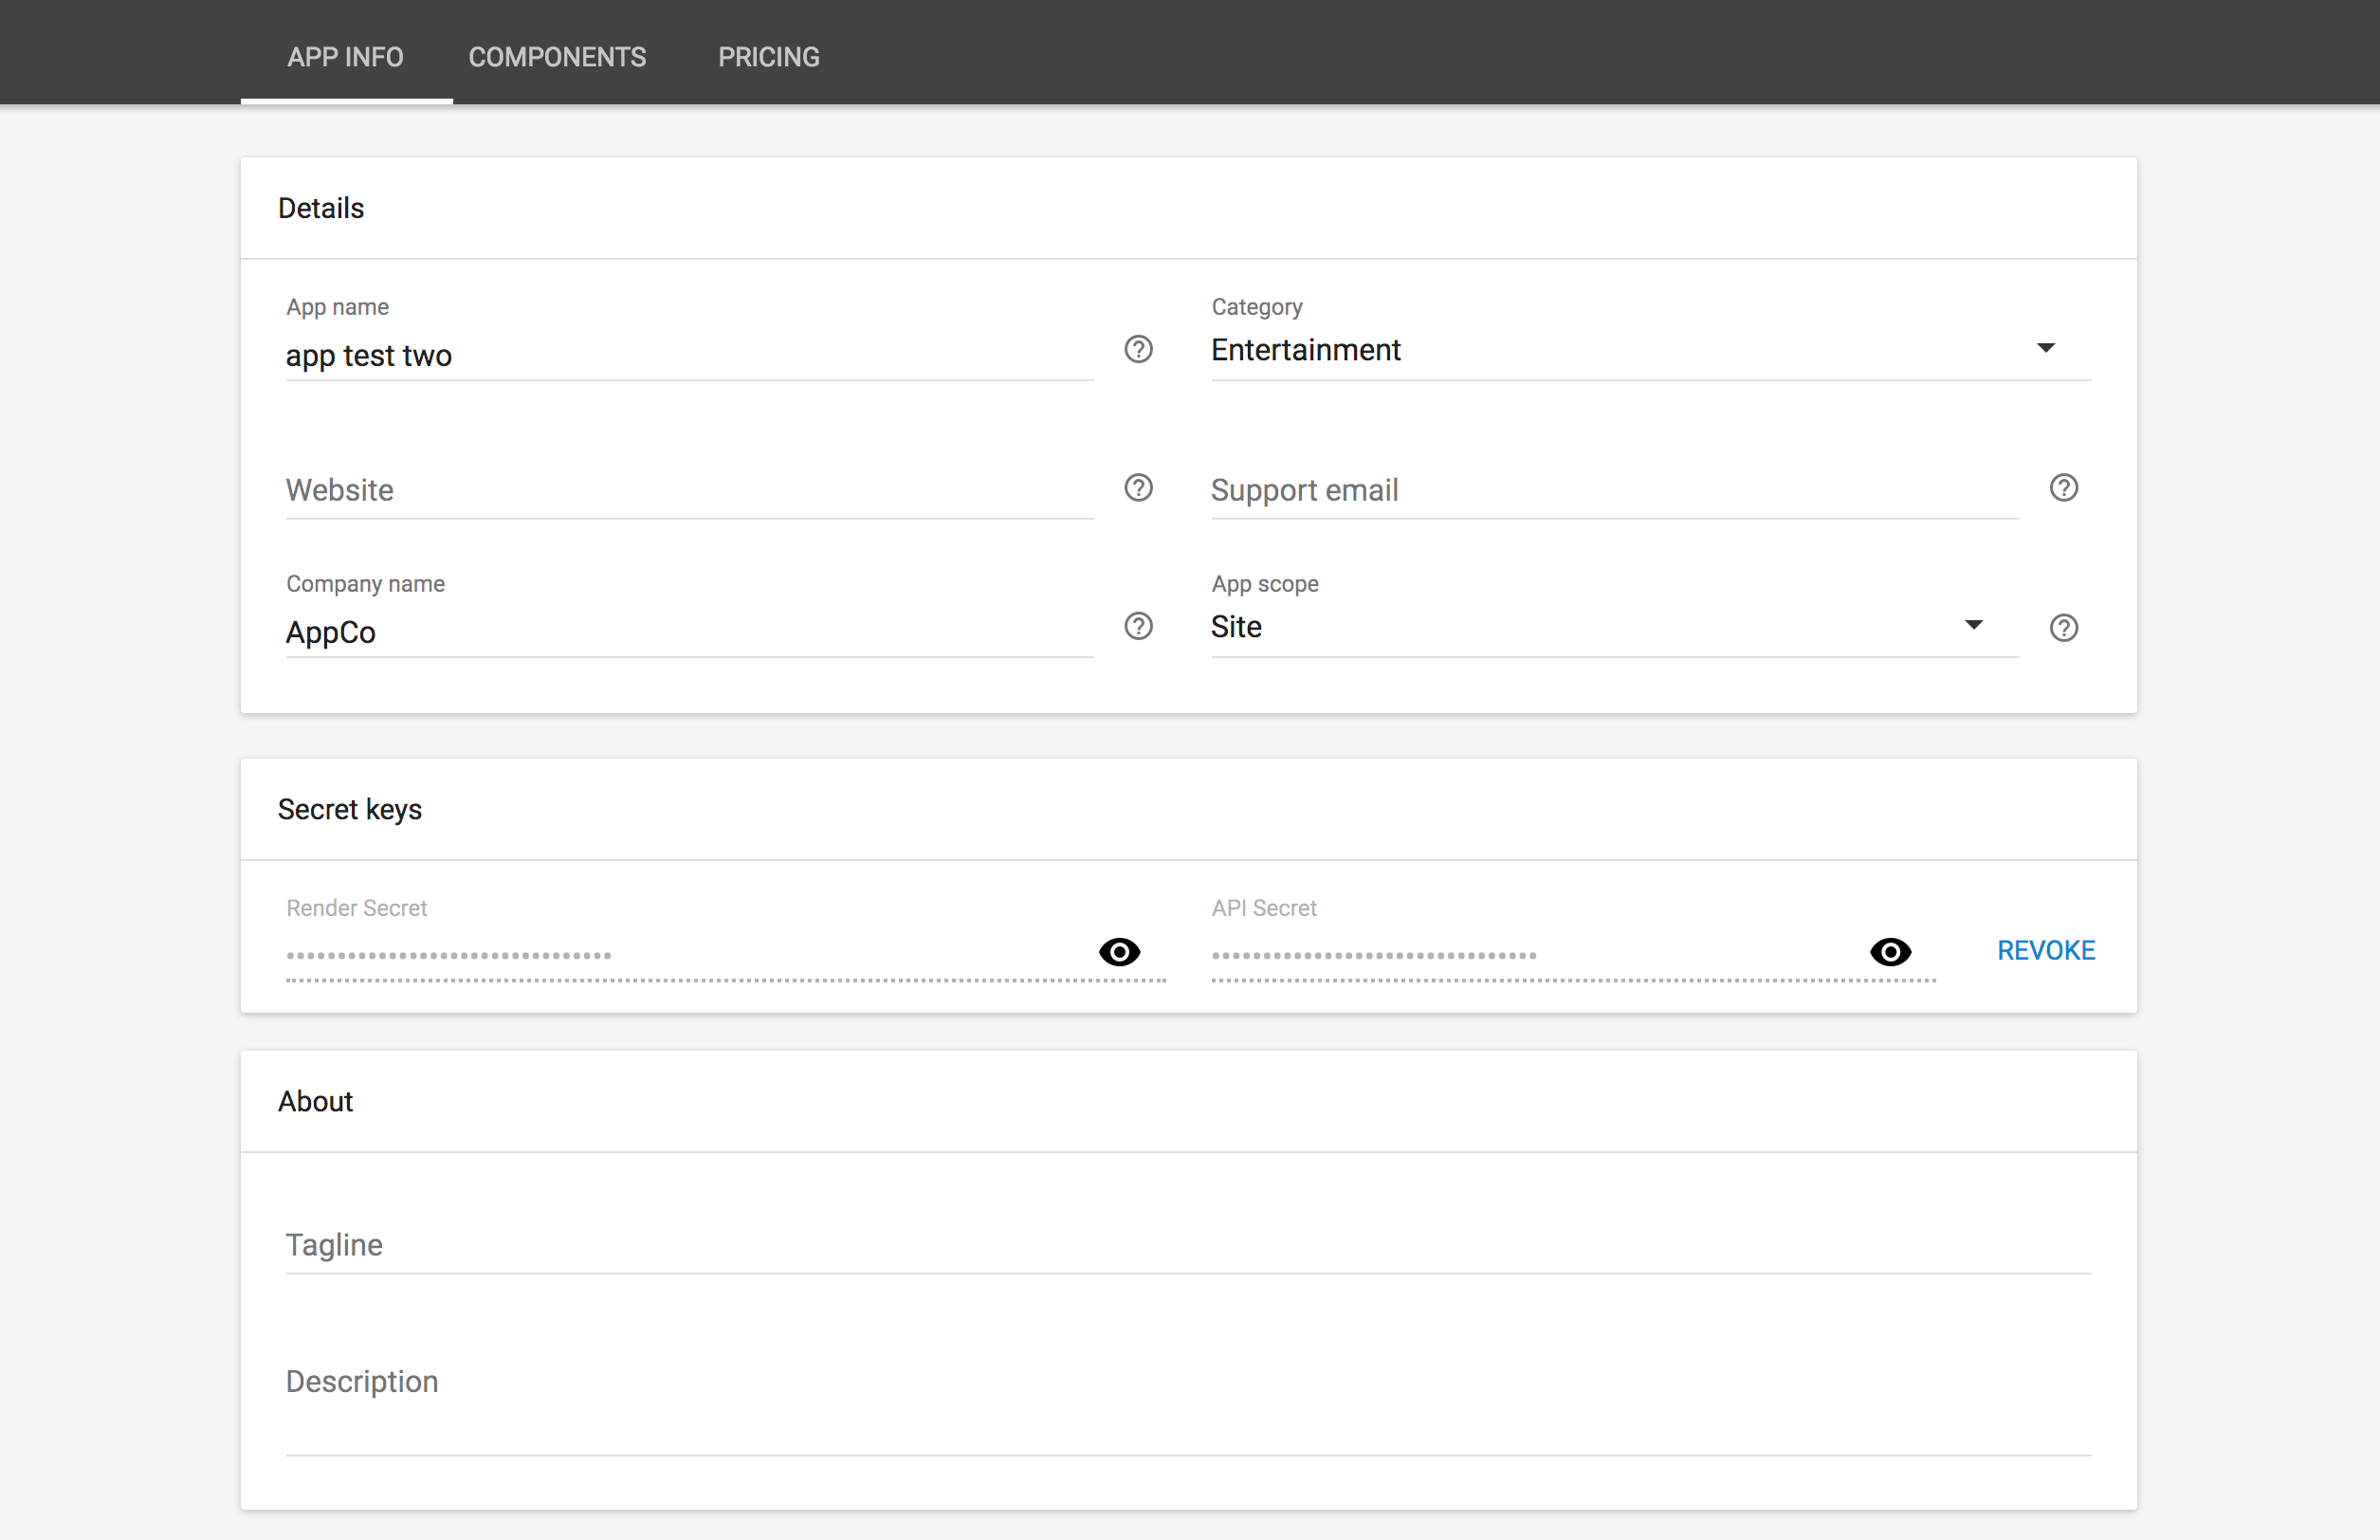
- You can view and copy both your secret and API keys by pressing the ‘eye’ icon next to each field.
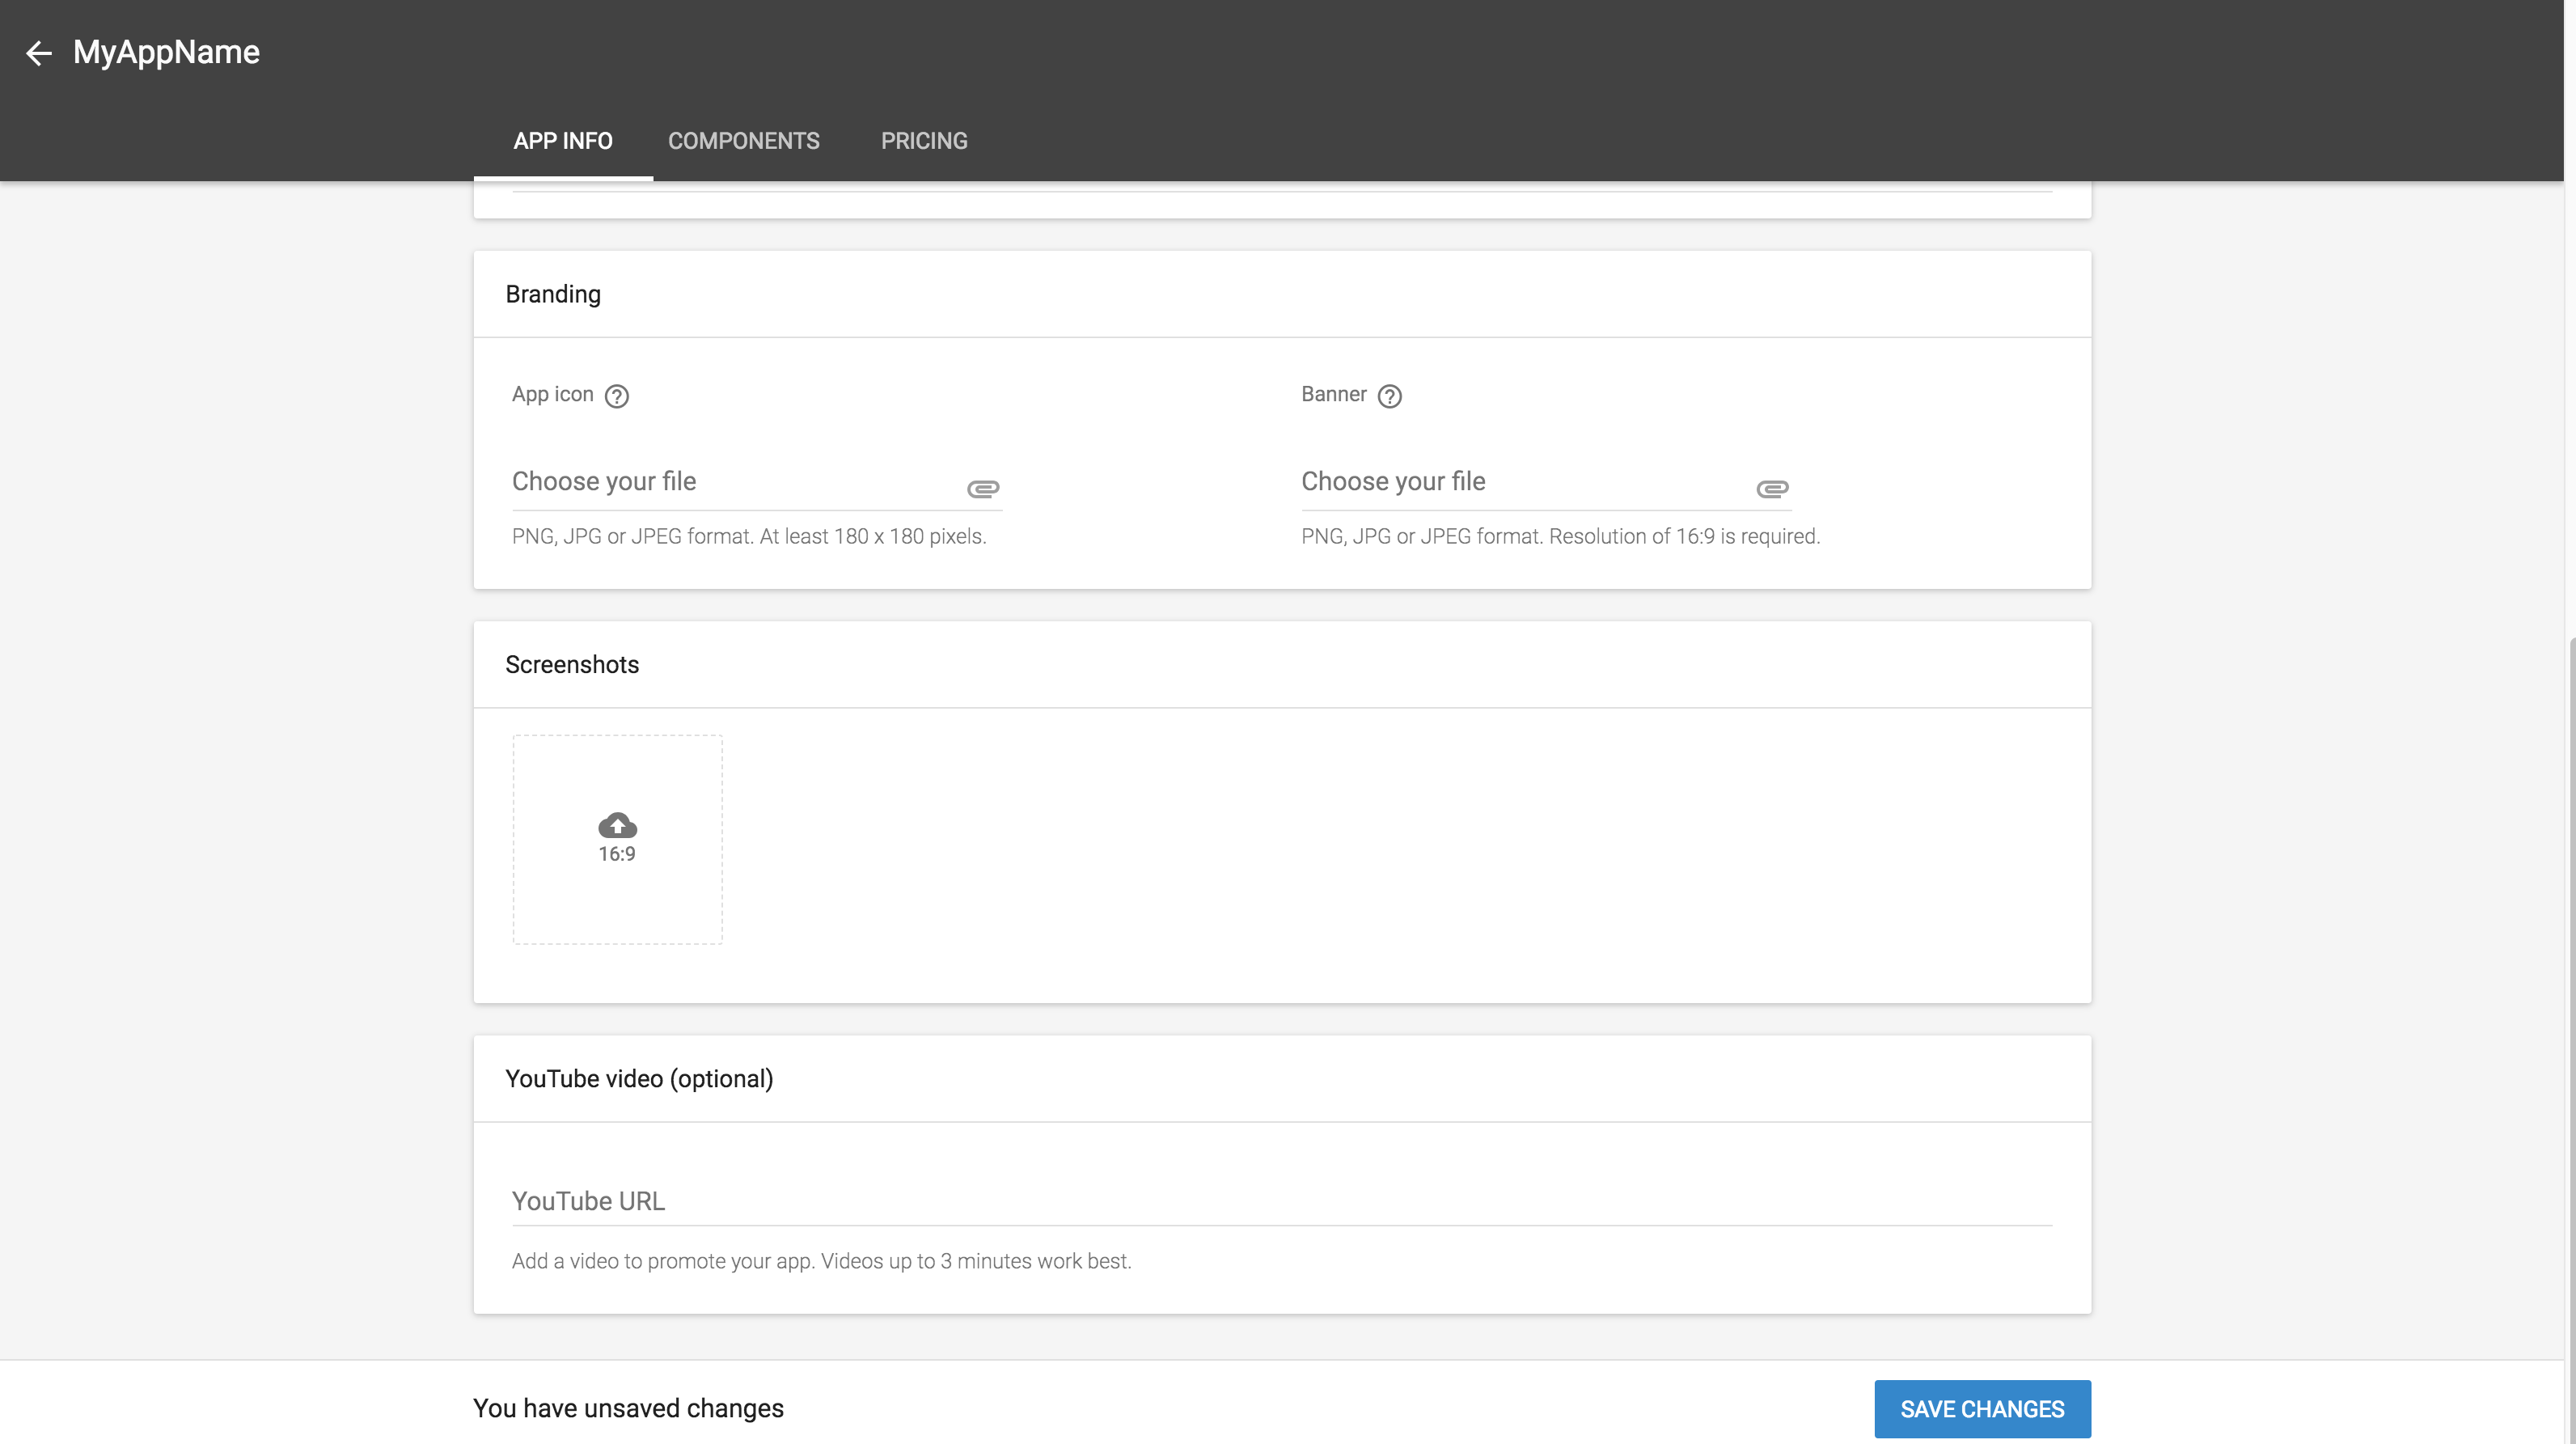
Next, add any screenshots, branding or marketing images, and video:
Images uploaded should be in either .png, .jpg, or .jpeg formats.
- You can upload an icon for your app or company. Your image file should be dimensionally square, at least 180x180 pixels.
- You can also upload a banner image with 16:9 proportions.
- Screenshots of your app to show different workflows and features can be added to show off your app. All screenshots need to be in 16:9 proportions.
-
A Youtube link can be added to show a promtional or instructional video of your app.
Make sure to click the ‘Save’ button at the bottom of the page to save any infomation you have added or changed.
After adding all your app info, you can configure the components of your app, which controls how your app works in the Builder Editor and in the Control Panel.